

I am done with reading forums with theoretical answers from people I don’t know. They always make sense, but we never get proof of whether those tweaks or solutions really work or not. I am thinking of making a small HexHardware lab on my 12600K computer. I have an idle table near my workstation, and I will be putting it to some use. So, rather than relying on theory, which I have studied in my college, I will make sure to do experiments. The goal will be to make my articles rich and practical.
This one is the first test, although the test bench is not ready. I am doing it on a fully built computer. But that doesn’t matter as long as I am providing you the results from real tests. Memory integrity is a very popular topic on forums (Reddit mainly), and comments are confusing. So, I tried testing the results in my own computer.
Memory integrity is essentially a Windows security feature. It checks every kernel driver inside an isolated, hypervisor-protected space before Windows lets it run. Microsoft is now switching it on for more eligible PCs through regular updates (the November 2026 update, KB5132061, is one of them), so you may have it on without ever touching the setting.
Because it runs under a hypervisor, many gamers say it costs FPS. I did not want to trust a forum thread, so I tested it on my own PC.
I played some games on my Intel Core i5-12600K with memory integrity on and off across three separate boots and compared the average FPS and the 1% lows. The results will be given and compared below. But, if you want a quick answer from the article, it’s here.
For most gamers, you should leave Memory Integrity on. On my i5-12600K, turning it off didn’t give a significant boost in FPS or 1% lows (results below). However, on older CPUs without the dedicated MBEC hardware, the performance boost can be bigger. Also, disabling this important feature can have some downsides as well. Let’s discuss everything in detail.
What Does Memory Integrity Actually Do?
It might sound like something related to the hardware or the RAM, but memory integrity is a software feature of Windows. When your PC runs, Windows and your drivers are loaded into the RAM. As you might know, drivers are small programs that let Windows talk to your hardware, like keyboard, GPU, CPU, mouse, etc. The core of Windows, called the kernel, and these drivers run with the highest level of access, so memory integrity protects that part of memory. It basically allows only trusted code to run there.
In the Windows settings, the function of memory integrity is defined as “Prevents attacks from inserting malicious code into high-security processes.“
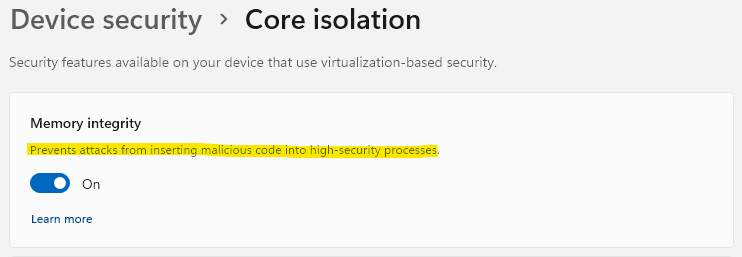
I would like to add there that the feature might be software, but it needs hardware features to work: CPU virtualization (Intel VT-x or AMD-V). It only runs if your CPU supports it and it is turned on in the BIOS. Some people refer to it as core isolation, but memory integrity sits under core isolation in Windows security.
If you are still confused, the main purpose of memory integrity is to protect the kernel, mainly from malware. Windows itself checks a driver’s signature using the kernel, but the problem is that malware with kernel access can change that check and let the bad driver in.
Memory integrity moves that check into a protected area that even the kernel cannot change.
Now, what does that cost?
Every code-integrity decision goes through the hypervisor (virtual machine monitor), and that is extra work for the CPU. This is where the setting gets its reputation among gamers.
Newer CPUs have hardware help for this job called MBEC (Mode-Based Execution Control). Intel added it from the 7th Gen, so my i5-12600K has it. Older processors have to emulate it, and Microsoft says that “will have a bigger impact on performance.”
How Did I Test Memory Integrity On vs. Off?
I do not have an RTX graphics card, so I managed to get a 3060 from my friend for this test. My system specs are as follows:
- CPU: Intel Core i5-12600K, [stock]
- Motherboard: MSI PRO Z690-A
- Cooler: 240mm AIO
- GPU and RAM: RTX 3060 12GB
- Software: Windows 11 Pro
Games run
- Counter-Strike 2 (1080p, low preset) – CPU-limited at low settings.
- Cyberpunk 2077 (1080p, low preset) – at 1080p/Low, it is also largely CPU-limited on high-end GPUs.
- Marvel’s Spider-Man 2 (1440p, high with RTX on)- An Unreal Engine 5 game with ray tracing, GPU-limited in this configuration.
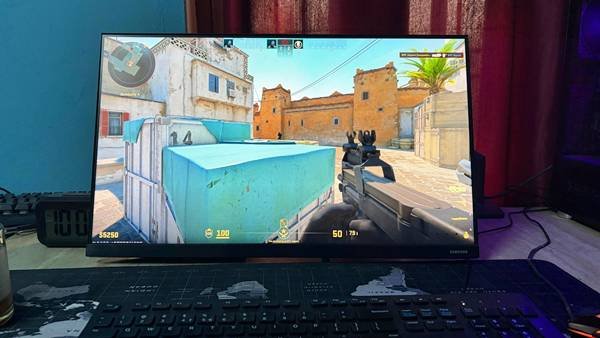
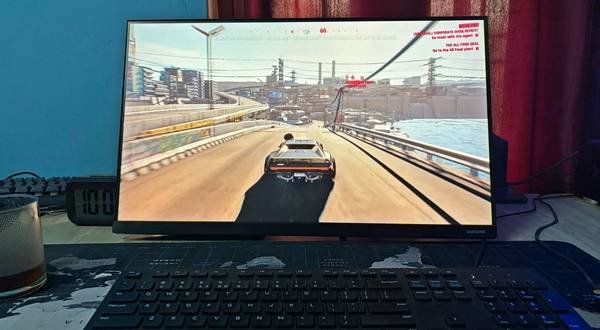
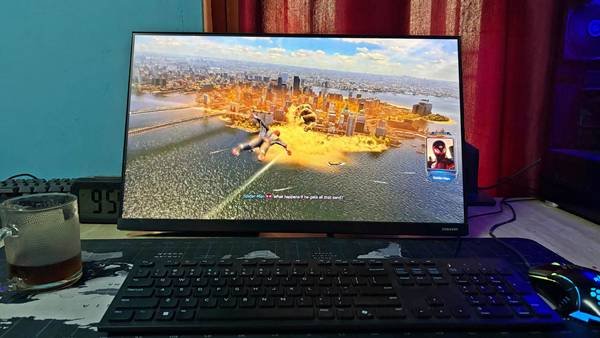
All tests used three runs per configuration to average out variability. Differences are computed as (Off – On) / On × 100 (higher % means the Off state ran faster).
Results: Memory Integrity On vs. Off
| Game and settings | Memory Integrity | Avg FPS | 1% low |
|---|---|---|---|
| Counter-Strike 2, 1080p Low | On | 398.2 | 167.3 |
| Off | 404.8 | 158.6 | |
| Difference | +1.7% | −5.2% | |
| Cyberpunk 2077, 1080p Low | On | 183.1 | 116.8 |
| Off | 186.5 | 124.5 | |
| Difference | +1.9% | +6.6% | |
| Spider-Man 2, 1440p High + RT | On | 75.3 | 66.9 |
| Off | 77.2 | 69.0 | |
| Difference | +2.5% | +3.1% |
Difference = (Off − On) ÷ On × 100. Higher is better in every column, so a positive number means Off was faster.
The biggest gap I saw was 6.6% in the 1% lows of Cyberpunk 2077, which went from 116.8 to 124.5 FPS with Memory Integrity off.
In Cyberpunk 2077 at 1080p low, the average went from 183.1 to 186.5 FPS with memory integrity off, a gain of 1.9%. The 1% lows went from 116.8 to 124.5 FPS, a gain of 6.6%. This is the CPU-heavy case where I expected the largest gap, because the GPU is not the limit.
In Counter-Strike 2 at 1080p Low, the average went from 398.2 to 404.8 FPS (1.7%), but the 1% lows went the other way, from 167.3 to 158.6 FPS (−5.2%). So, the 1% lows are not a one-way story, and I would not read much into a gap this small.
In Spider-Man 2 at 1440p high with ray tracing, the GPU sets the pace. The average went from 75.3 to 77.2 FPS (2.5%), and the 1% lows went from 66.9 to 69.0 FPS (3.1%). That is a small gain, which is what you would expect when the CPU-side cost of memory integrity has little room to show up.
These results largely agree with other reviewer data as well. The recent tests on CPUs with hardware virtualization support (Intel 7th gen or AMD Zen 2+ and newer) find memory integrity typically costs only a few percent of FPS.
Why Memory Integrity Can Cost FPS, and Why a 12600K Feels It Less
Memory integrity only adds work when the kernel does something the hypervisor has to approve. Things like loading a driver or changing the permissions of a memory page are some of those tasks. A game drawing a normal frame spends most of its time in user mode and on the GPU, so it rarely triggers that.
That is why I expected a small hit. It is also why CPU-bound scenes at low resolution are where it would show first.
The MBEC hardware in my chip makes each of those approvals cheaper. On an older CPU that emulates it, every approval costs more. That fits what I measured. The biggest gap was in the 1% lows of a CPU-heavy game at 1080p Low, and the GPU-bound Spider-Man 2 test moved by only 2.5% to 3.1%.
When should you turn off memory integrity for gaming?
Memory integrity is turned on by default in on compatible Windows systems. But you might think about disabling it in only two cases. The first one is if you play CPU-heavy games at low settings. Secondly, if you have an older CPU, the chip emulates the feature, so you have the most to gain here. However, I would recommend testing it before trying.
Keep in mind what you give up. Memory integrity makes sure every driver is signed and trustworthy. If you install random driver tools or cracked software, do not turn it off. Turning it off means giving up an additional layer of Windows security. Keep it enabled unless your own benchmarks demonstrate a worthwhile performance improvement.
For my i5-12600K, memory integrity costs about 2% of average FPS in my games, and I am leaving it on. Test your own games before you decide, since it takes two reboots. I hope this helps!
How to Turn Off Memory Integrity on an MSI Motherboard
The process may vary based on your motherboard, but in case you have an MSI motherboard, you can follow these steps. Otherwise, this is the end of the article for you.
1. Check that virtualization is enabled in the BIOS.
Memory integrity needs CPU virtualization. Restart your PC and press Del repeatedly to open the BIOS. Press F7 for Advanced Mode, then go to OC Menu > CPU Features and set Intel Virtualization Tech to Enabled. Press F10 to save and exit.
If it was already enabled, leave it as it is. Menu names can differ a little between BIOS versions.
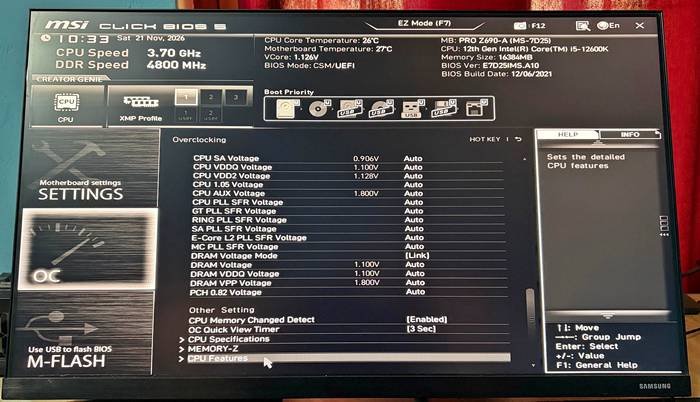
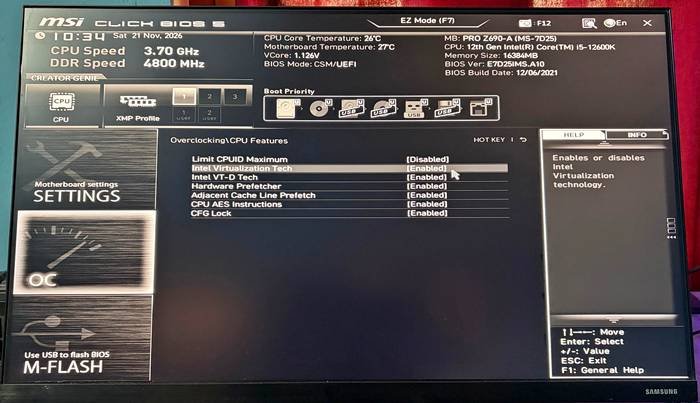
2. Check Whether Memory Integrity Is On Right Now
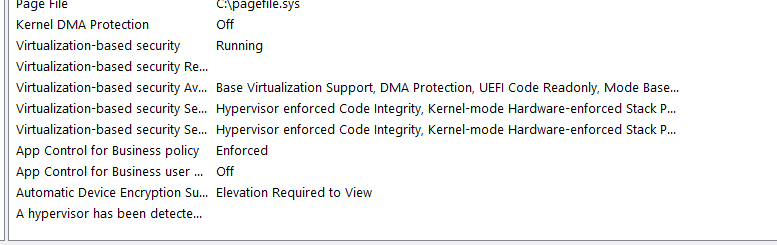
Press Win + R, type msinfo32 and press Enter. Look at Virtualization-based security Services Running. If it lists Hypervisor enforced Code Integrity, Memory Integrity is on.
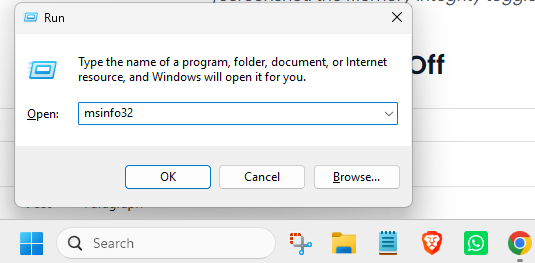
3. Turn Memory Integrity Off
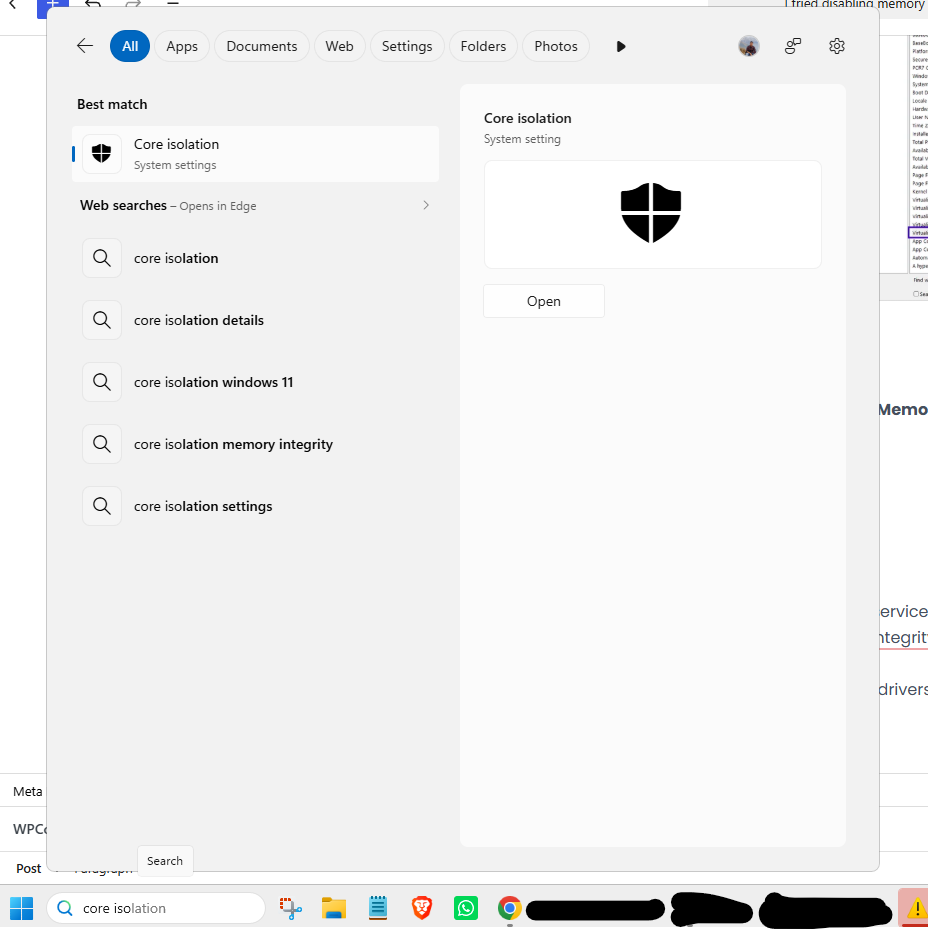
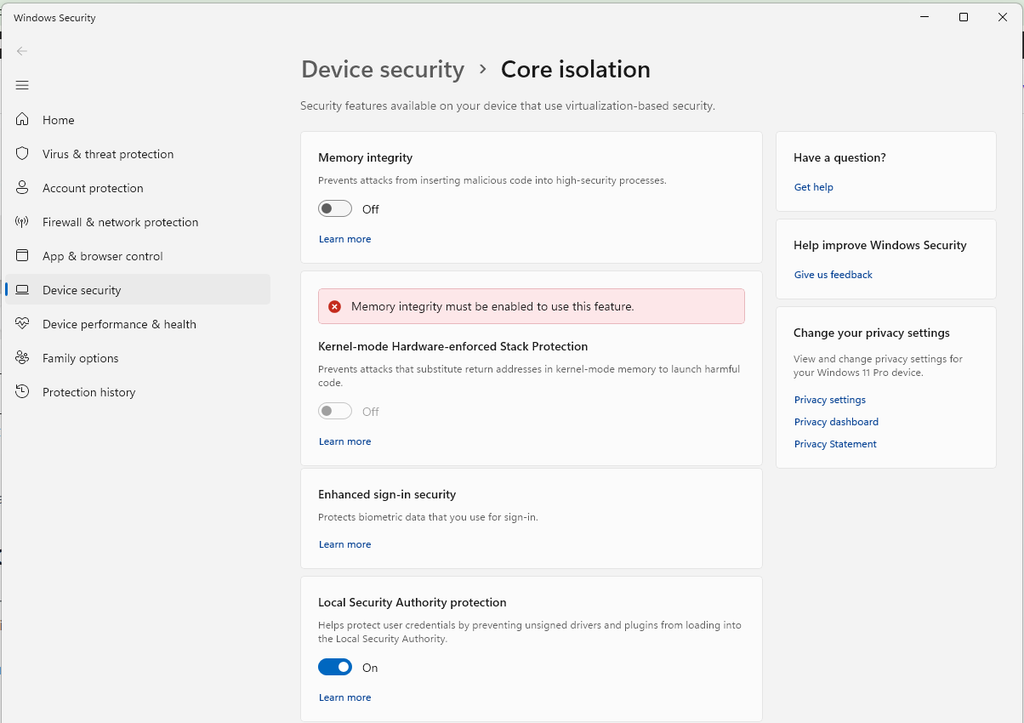
Click Start, type “Core isolation,” and open it. You will be taken to the Windows security menu. Click Core Isolation Details and switch Memory Integrity to Off. Accept the UAC prompt and restart the PC.
4. Confirm It Is Off
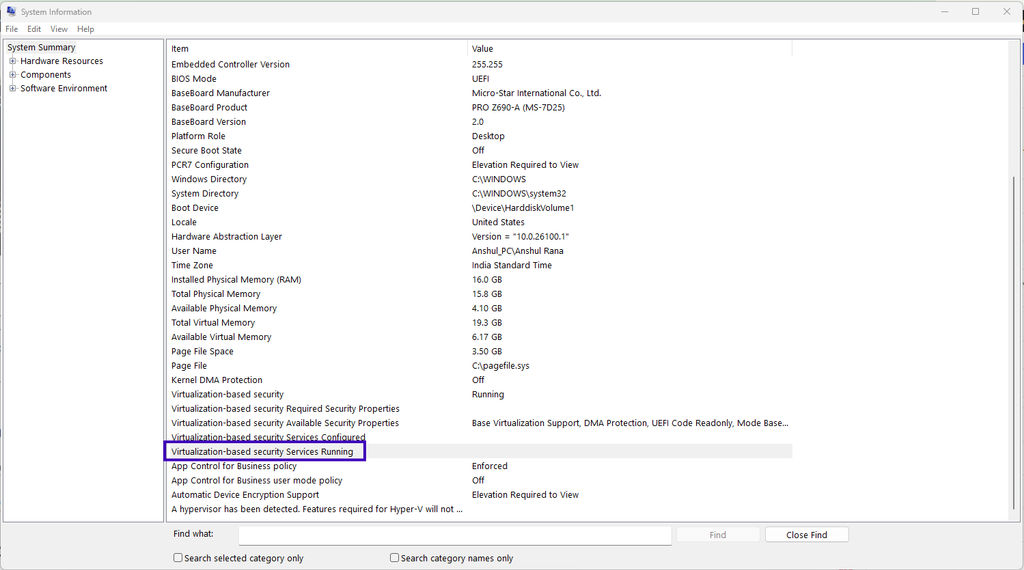
Open msinfo32 again. Hypervisor enforced Code Integrity should be gone from the services line. If Virtualization-based security still says running, that is VBS on its own, and it can run without memory integrity. I only tested memory integrity.
To turn it back on, use the same toggle. Windows may warn you about incompatible drivers first.