

Overclocking your hardware involves adjusting system frequencies and voltages beyond the manufacturer’s stock specifications. This process carries inherent risks to your hardware and data. Read this guide before you start.
In our CPU overclocking overview article, we discussed a little about the basics of overclocking an Intel CPU. So, if you are a complete newbie to overclocking, I would recommend reading that article first. However, that was just an introduction. Here, I’m going to walk you through the whole process in detail. My computer has a 12600K, which is unlocked, and I will use it as our reference CPU in this article.
Intel overclocking today is not one procedure. It depends entirely on your CPU’s generation. Intel overclocking today is not one procedure. For example, on the 13th and 14th gen, the correct move is less voltage, not more.
Intel CPU Overclocking Guide 2026
We are going to discuss everything in this article to get you started with Intel CPU overclocking. Then I will be publishing the detailed overclocking guides for specific CPU generations.
Can you actually overclock your Intel CPU?
You will need five items to get started.
- An unlocked CPU. K, KF, or KS. Non-K chips can’t have their core ratio changed. (Memory tuning still works on locked chips, as long as the chipset supports it.) And some Z-boards vendors have BCLK overclocking on locked 12th- and 13th-gen parts.
- A Z-series motherboard. Z690/Z790 for 12th–14th gen, though Z690 needs a BIOS update for 13th and 14th gen. Z890 for Core Ultra 200S. B660/B760 and H670/H770 allow XMP and sometimes power-limit adjustment but not core ratios; H610 doesn’t support memory overclocking at all. This is Intel’s biggest disadvantage vs. AMD, where most cheap B-series boards allow PBO (B840 being the exception.)
- A real cooler. A 240mm AIO or large dual-tower air cooler is the practical floor for an i7/i9 or Core Ultra 7/9. Temperature is a hard ceiling on everything you’re about to do.
- PSU headroom. A 14900K can transiently pull well past its 253 W rating. Don’t tune on a marginal supply.
- An updated BIOS and chipset driver. Non-negotiable on 13th/14th gen.
Find your platform first.
In my experience, the 12th generation Intel Core CPUs provide the best overclock results. They were launched on a new process with conservative clocks, and there is genuinely a lot of unclaimed frequency above stock. This is probably the last generation where traditional multiplier overclocking still pays off. However, it will depend heavily on the SKU. For example, a 12600K has real room above stock, while a 12900K already ships much closer to its practical limit.
If you want to overclock a 13th or 14th-generation CPU, you have to keep your aims in check. These processors use the same Intel 7 node as the 12th generation, so they already ship near the top of the voltage/frequency curve.
In fact, Intel has identified several voltage-related mechanisms that could cause Vmin Shift Instability in 13th- and 14th-generation processors, including elevated motherboard power settings and excessive voltage requests from microcode/SVID behavior. Intel subsequently introduced mitigations through BIOS/microcode updates, including 0x125, 0x129, and 0x12B.
The Core Ultra 200S CPUs barely respond to added voltage. However, the die-to-die and uncore clocks ship well below what they’ll run. We are talking about 2.1 GHz D2D and 2.6 GHz NGU against 3.2 GHz for both under 200S Boost.
Here is a table to simplify things for you.
| Generation | Chips | What you should actually do |
|---|---|---|
| 12th gen | 12600K–12900K | Classic overclock. Real headroom exists. |
| 13th/14th gen | 13600K–14900K | Undervolt and stabilize. Do not add voltage. |
| Core Ultra 200S / 200S Plus | 245K–290K Plus | Tune the fabric, not the cores. |
What changed in the modern Intel CPUs for overclocking?
Earlier, the multiplier was used to set the speed. Now it’s better understood as a ceiling.
Why am I saying that?
Well, the core ratio determines the maximum frequency the CPU can ask for a given group of cores. It doesn’t force the process to run at that frequency continuously. At what frequency the CPU runs depends heavily on whichever limit comes first, including power, current, temperature, or voltage. So, if you raise a ceiling that isn’t a restriction at all, it does nothing. This is why a multiplier set at 55x can still run the CPU at 5.2, and it is normal.
So, the five knobs that really matter are power limits (PL1/PL2/Tau), current limit (ICCMax), voltage curve, load-line curve, and fabric clock (in arrow lake).
For example, if the temperature is the limiting factor, raising the ICCMax would do nothing. Similarly, raising PL2 won’t help if the CPU is already hitting its voltage or thermal limits.
If power or heat is the binding limit, reducing the voltage is the way. With this, you stay at the same multiplier but get more actual MHz. This is why undervolting has become almost as important as traditional overclocking on Intel’s 13th- and 14th-generation CPUs.
The important tools
1. Intel XTU (Extreme Tuning Utility)
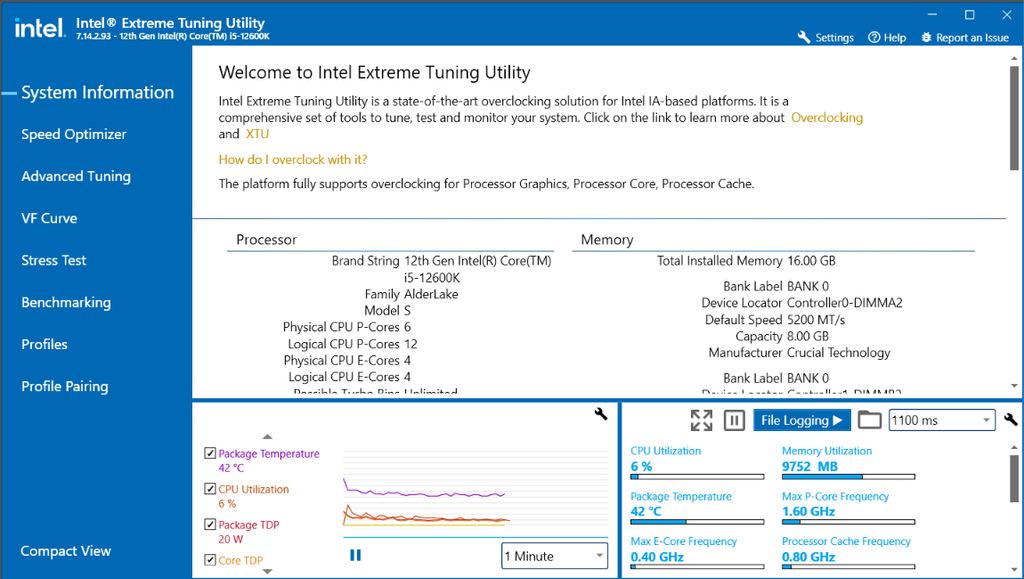
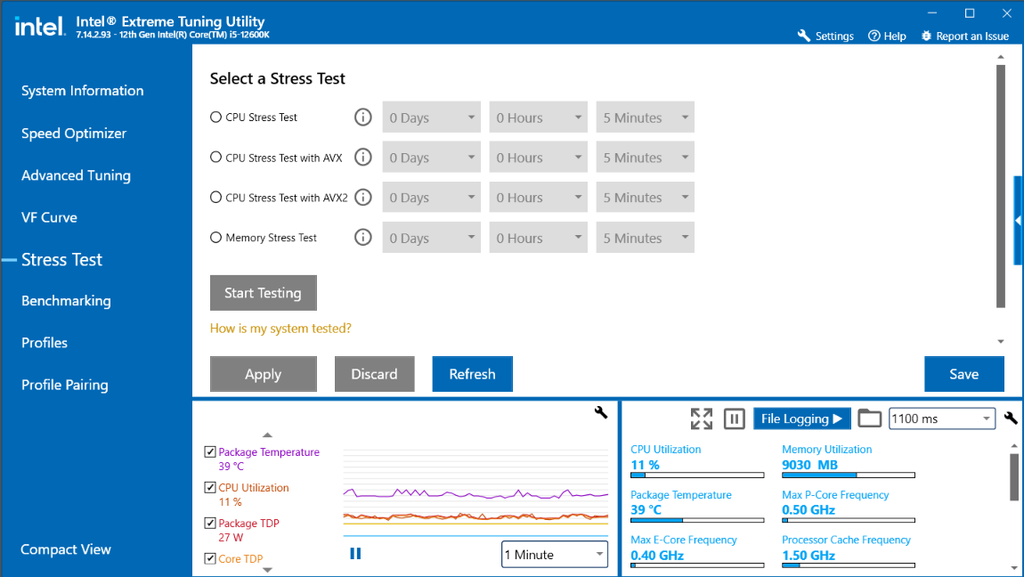
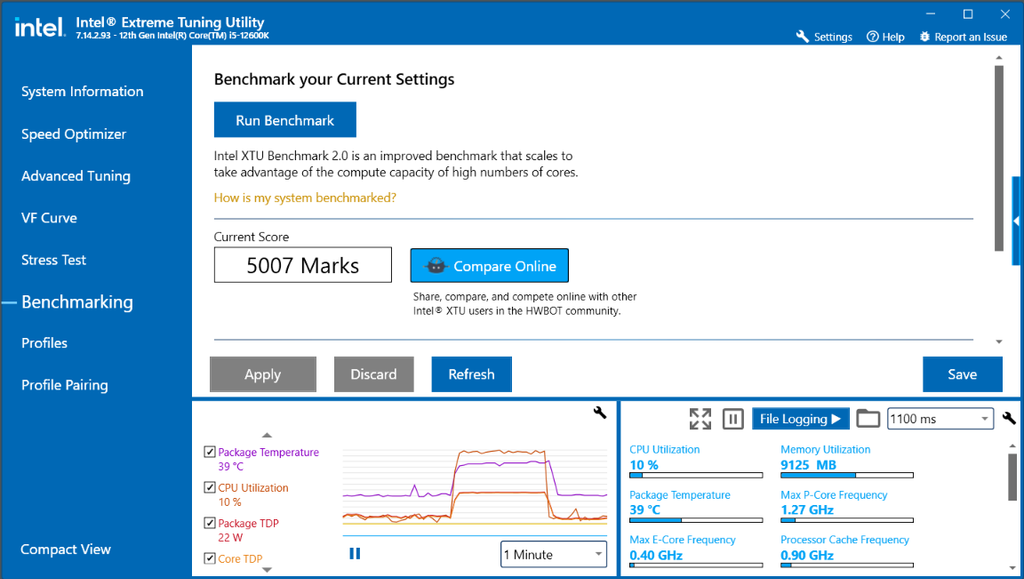
Intel XTU is the official Windows tool that allows you to test settings without rebooting. Once you reboot your system, these settings reset. By default the settings revert on restart, though you can save a profile in the Profiles tab and set it to apply at startup. Note that there are two builds: XTU 7.14 for 14th gen and older and XTU 10.0 for Core Ultra Series 2. Both require a Z-series chipset for full overclocking.
XTU is a great tool for experimenting and finding your values, which can then be committed in the BIOS as new defaults. It also shows you performance, temperature, voltage, wattage, and various other graphs in real time. You can stress-test and benchmark your system on the go with it. So, all in all, this is a good starting point for tweaking values and seeing what happens.
You can experiment with new voltage values and higher ratios. You can increase voltage and adjust power limits. However, this can be overwhelming because the number of settings is huge. So, it is important that you do the changes in small steps.
Don’t think that you can’t harm your CPU while using XTU because it is done only on Windows. The changes are actually happening to the hardware, and the harm accrues while it’s running on those settings. The voltage damage doesn’t care which tool set it.
2. HWiNFO64
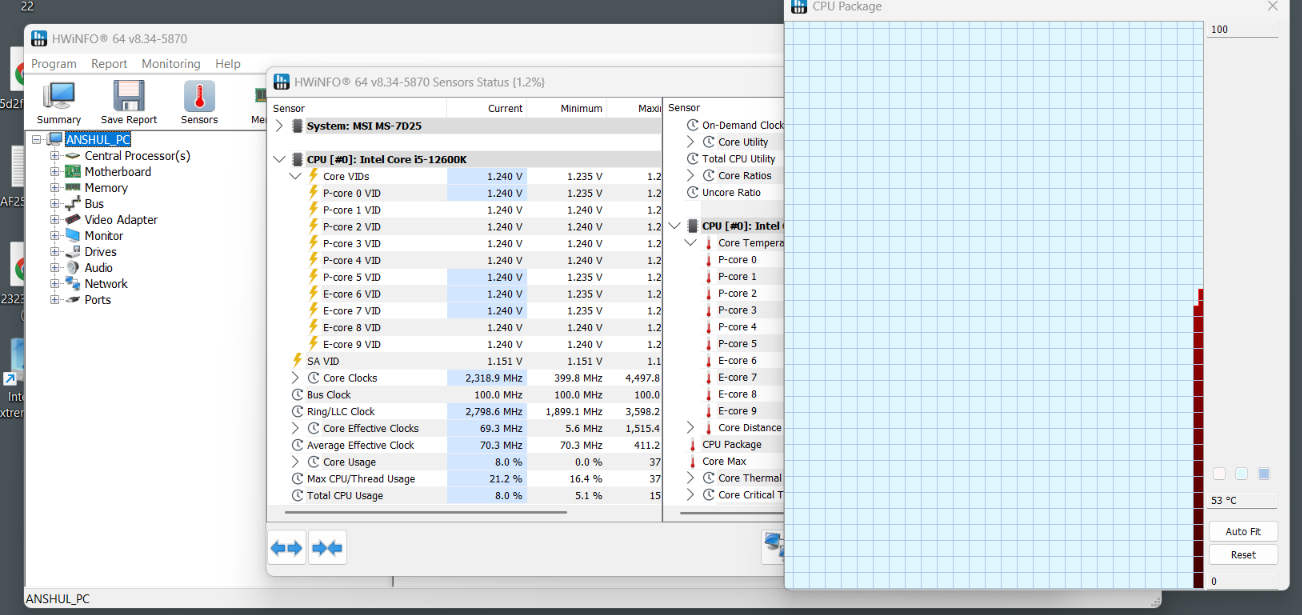
HWiNFO64 is going to be your monitoring software. It should be used mainly to watch effective clocks and other sensors’ data like temperature, power, and ICCMax. Also, it can be used to monitor the throttling flags such as “IA: ICCmax Limit Throttling” and the WHEA error counter.
Effective clock vs. requested clock
A very important row in HWiNFO is the effective clock. It is not the reported core clock. The reported clock is what the CPU says it’s targeting, while the effective clock is the average frequency actually delivered over the sampling interval, accounting for idle cycles and clock stretching.
When you cut voltage below what the silicon needs at a given frequency, Intel chips don’t necessarily crash. Instead, the clock generator stretches. This makes the reported frequency stay at 5.0 GHz while the real work per cycle drops. Your CPU will look perfectly fine, and HWiNFO shows the multiplier you set, and the temperature is down, but you get a bad benchmark score. This is why every undervolt step needs a benchmark run, not just a stability check.
WHEA errors and silent instability
Watch HWiNFO’s WHEA error counter during every validation run, and check Windows Event Viewer under Windows Logs. HWiNFO report this inside the interface.
3. BIOS/UEFI
BIOS is where all the settings persist and you do the actual changes that run permanently with your system.
4. Stability-testing tools
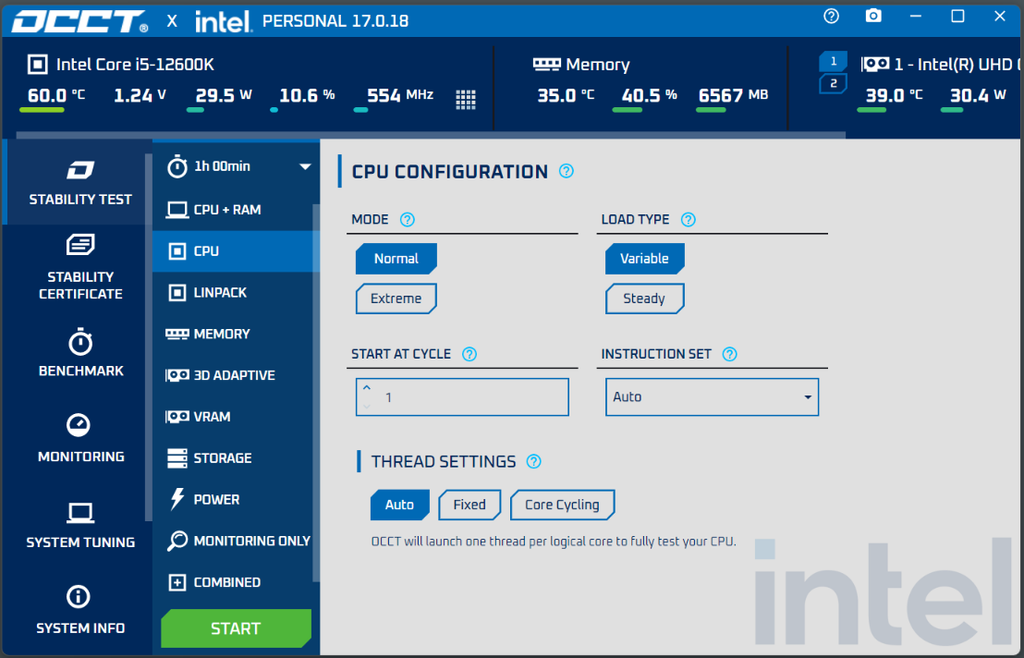
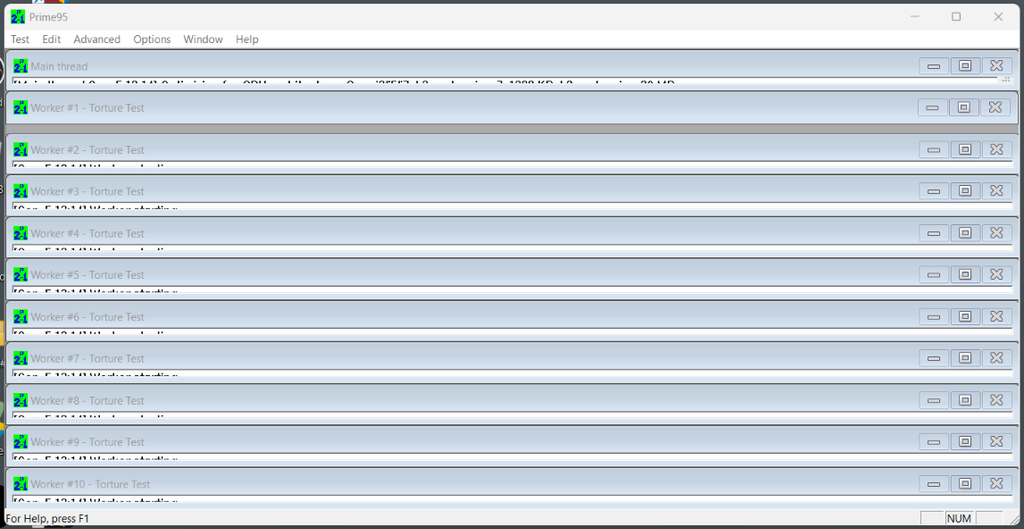
You have multiple options here, and I would recommend trying all of them. These are OCCT, Prime95, and Cinebench. I have discussed them all in this article. Once you apply your settings, this software actually tests whether your settings are actually stable under different workloads. It is possible that a certain undervolt is going to fail under a particular workload, and these tools make sure different types of those operations are performed before you are fully sure.
Prime95 Small FFT is the opposite problem on 13th and 14th gen: it’s punishing enough to trip ICCMax and thermal limits on settings that are fine in every real workload, so use Blend or Large FFT on those chips.
How to overclock?
Because different CPUs are different in terms of their hardware and what temperature, voltage, current, and wattage they can handle, nobody can provide you the exact overclock profiles that you apply right away. And that is a good thing because you can follow steps that allow you to overclock your specific CPU to its specific limits rather than copying what others have tried and tested.
Before you start
Before you start, I would recommend updating your BIOS, especially if you are on 13th or 14th-gen Intel. Establish a real baseline by running Cinebench and maybe 30 minutes of gaming. Record score, peak temperature, peak package power, and peak voltage. I would recommend writing everything down. Make sure you know your recovery paths, like clearing your CMOS, resetting BIOS, or force restarts. It is better to avoid fixed override voltage on the 13th and 14th gen. It is good to use adaptive or offset modes.
Intel’s standard warranty doesn’t cover overclocking damage. So keep that in mind before you proceed. This is an exception here. The 200S Boost on Arrow Lake is warranty safe by design.
Your first step will be to run Cinebench R23 (multi-core) for 10 minutes with HWiNFO64 open.
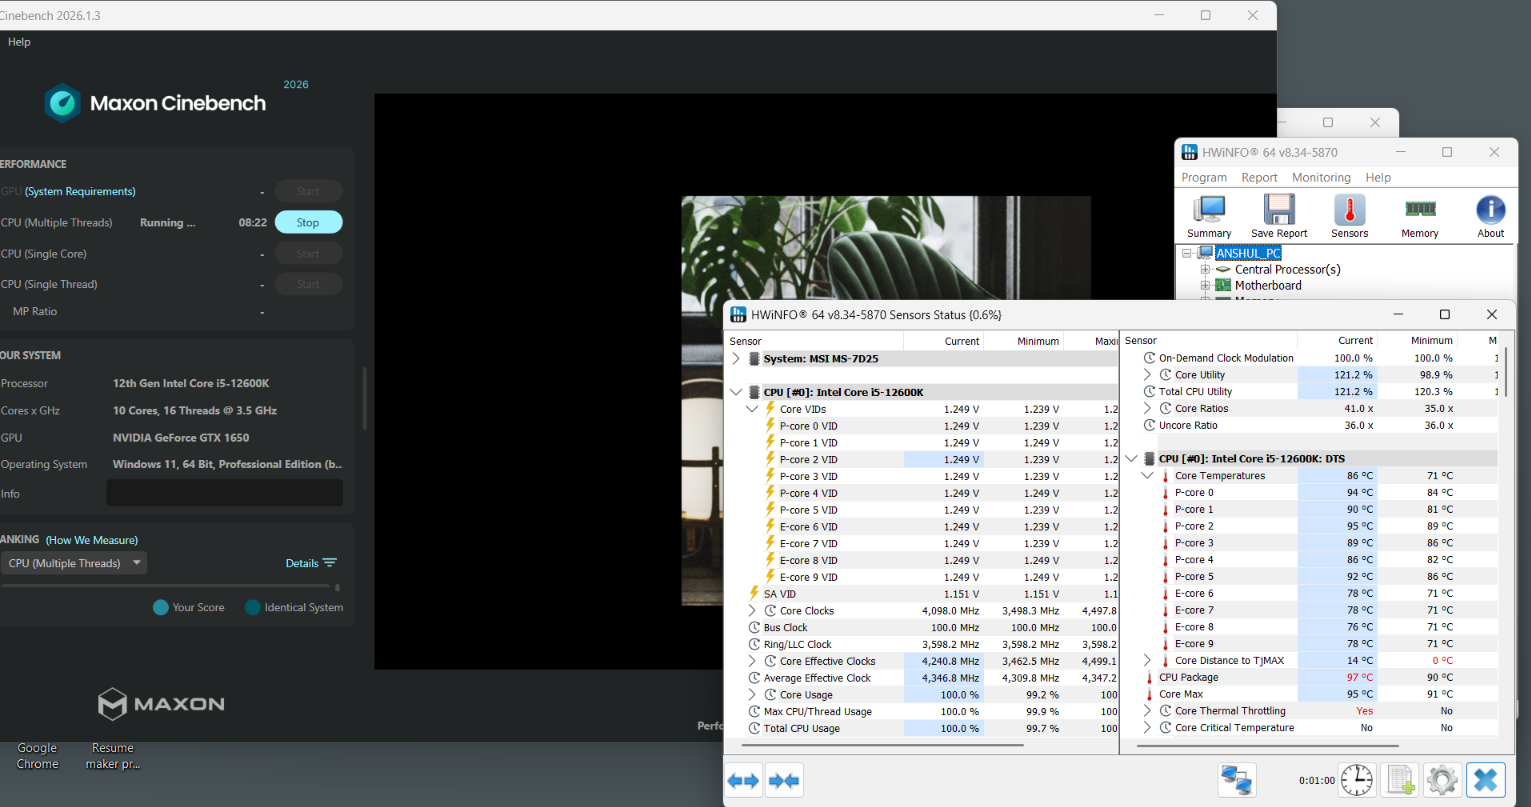
Record the maximum of these six fields:
- CPU Core VID (requested voltage)
- Vcore (actual delivered)
- CPU Package Power
- CPU package temperature
- IA Cores effective clock
- CPU Core current (IA)
VID is going to your main target. It shows what voltage the chip is asking for.
1. Use XTU to learn before committing anything.
I hope you have downloaded XTU. So, just open it up and have a look around. I suggest that if you can get your overclock done just with the XTU, it is better than playing around with the BIOS. It is safe, reversable, and allows you to do everything without touching the BIOS.
Before anything else, you can try the new Intel Speed Optimizer 2.0, which applies a one-click overclock using Intel’s pre-validated values for your CPU. You just go to the Speed Optimizer section and press the Optimize Now button.
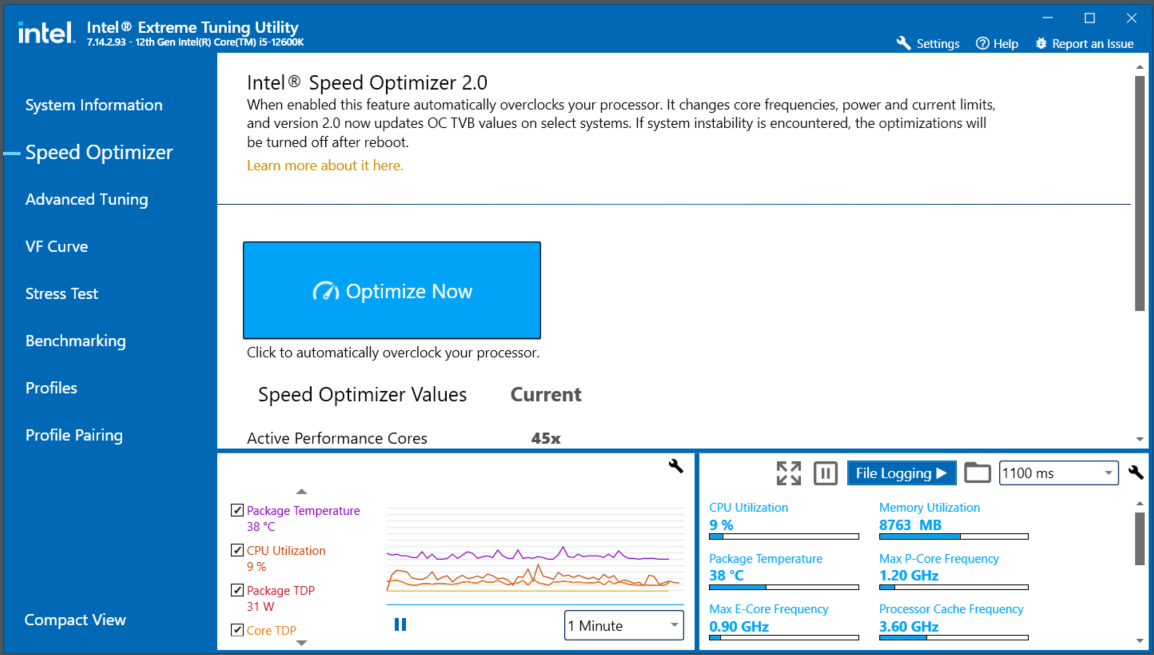
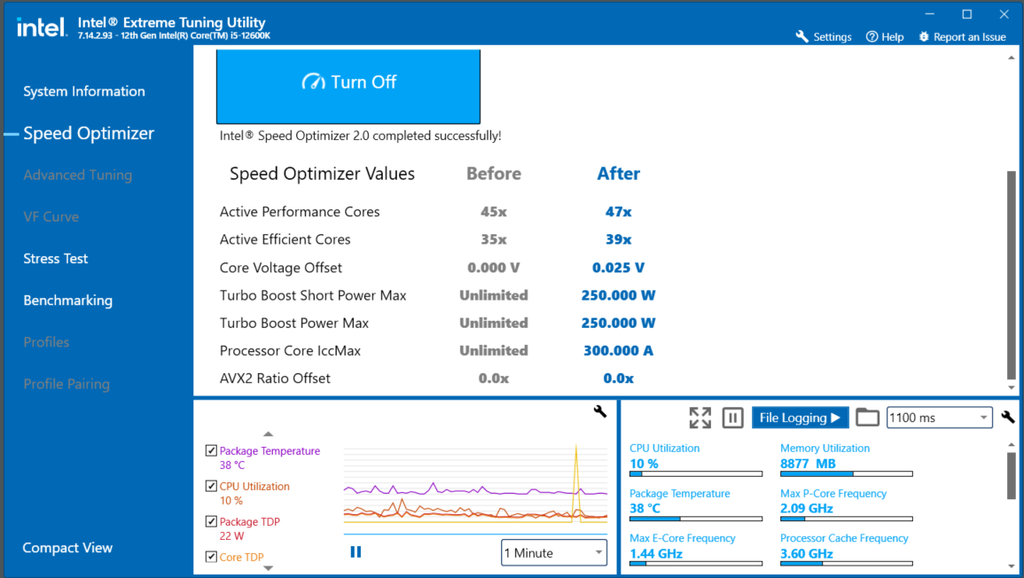
XTU will automatically find the safe settings and apply them to the system. In my case, it took my 45x multiplier to 47, which isn’t that much, but I can be assured that these settings will be stable in the long run.
However, for manual setting, we have to go to the Advanced Tuning section. There too, we have to stay mainly in the Core section because this is where the overclocking is done.
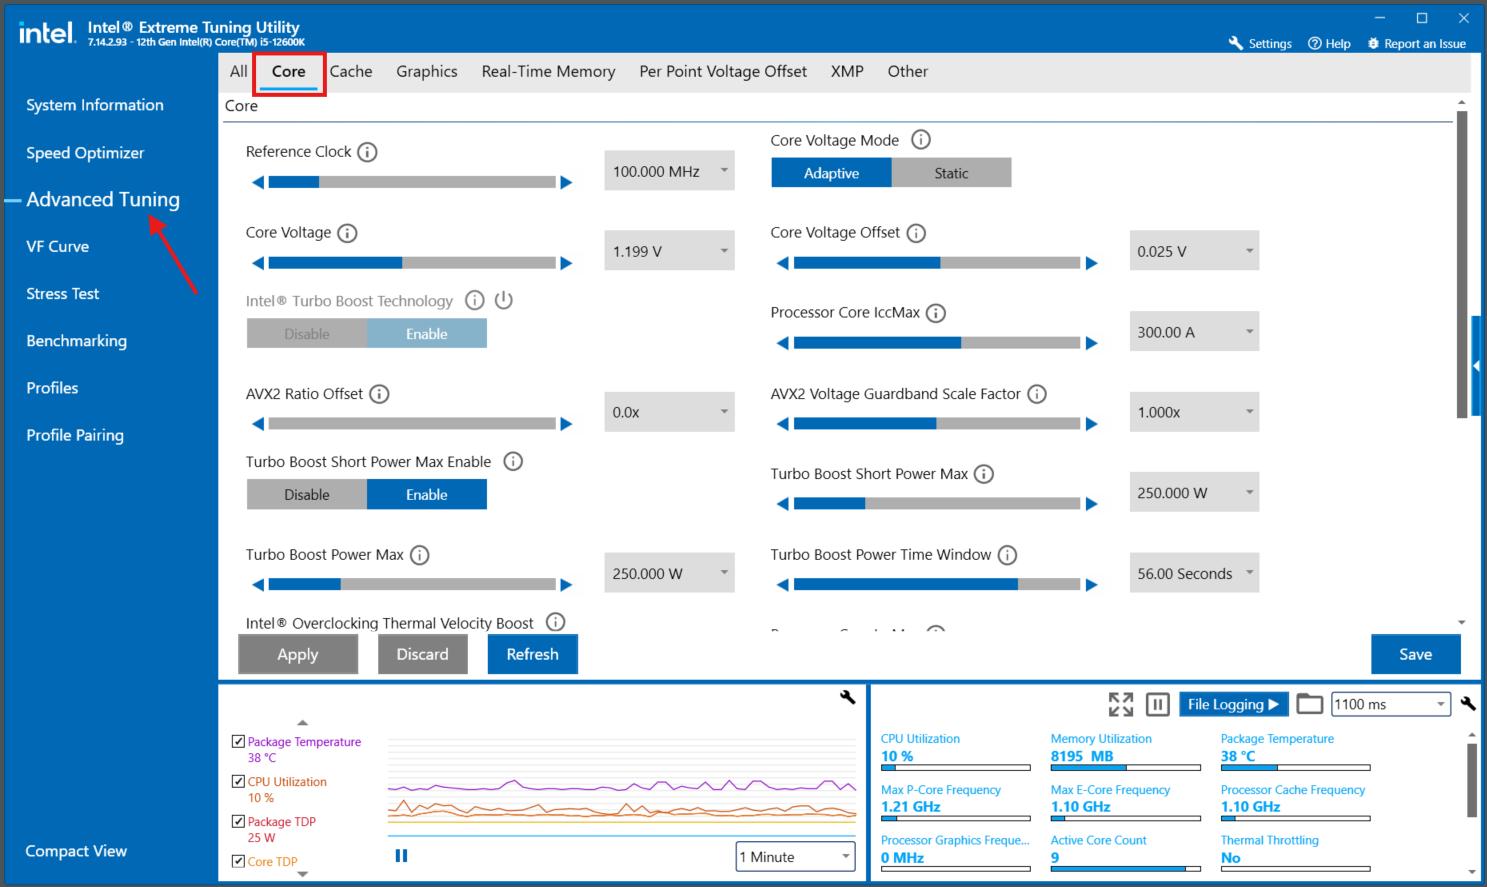
Note: My processor is an Intel Core i5 12600K, which has the maximum single-core boost clock of 4.9 GHz. However, the actual multiplier is set at 47x (which means the all-core boost is set at around 4.7 GHz). You can confirm your CPU’s current multiplier at the end of the XTU’s core section.
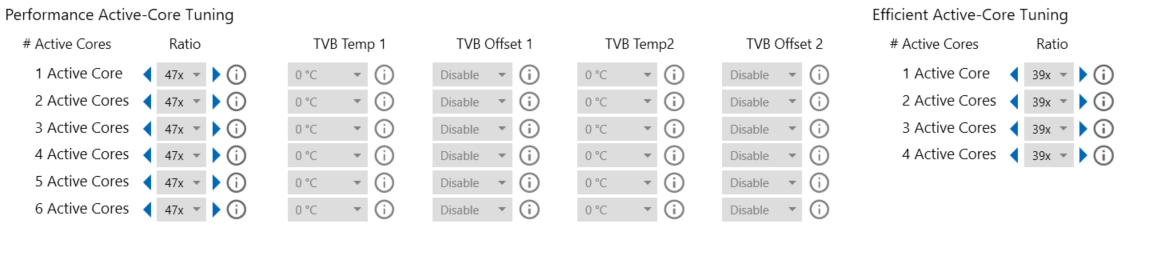
Manual tuning with XTU
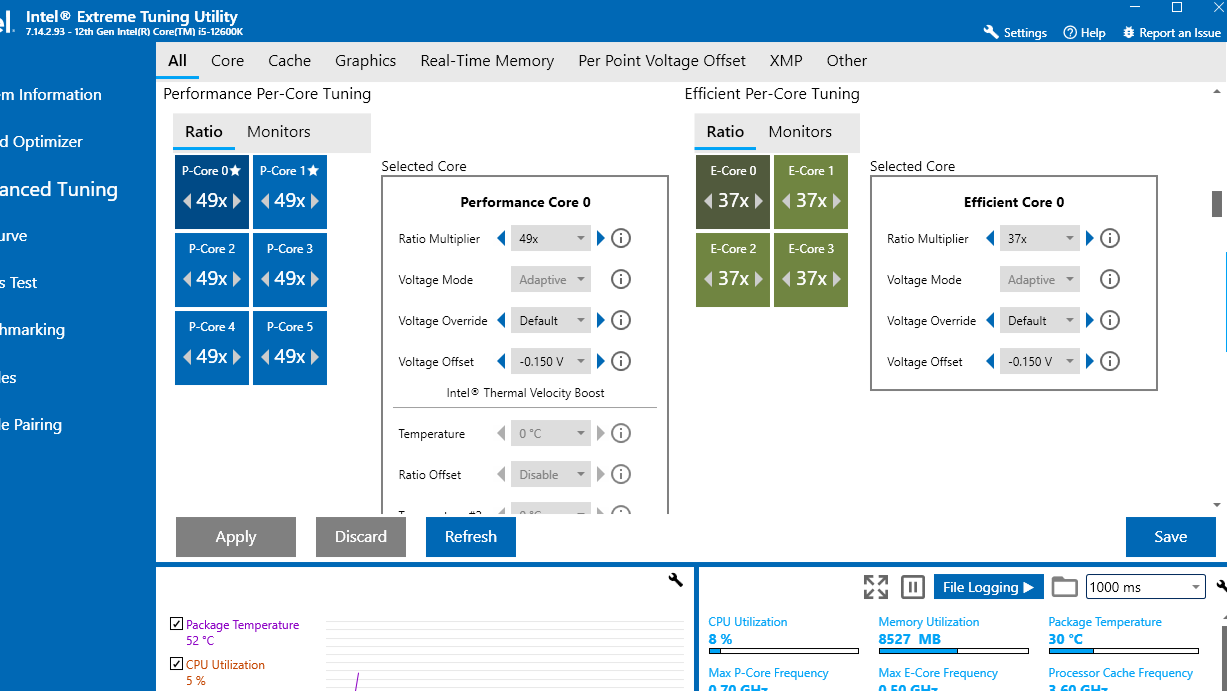
So, now, we are going to start to increase the ratio of each core separately and apply changes on the go. But, first, let’s understand the two sections at the bottom, i.e., Performance Active-Core Tuning/Efficient Active-Core Tuning vs. Performance Per-Core Tuning/Efficient Per-Core Tuning. Because the boost clock can behave differently based on the workload, the maximum marketed boost speed is generally for single-core boost. So, if you want to boost your CPU for a number of cores working at the same time, you use the active-core tuning section. However, if you want to increase the speed of a specific core, you choose per-core tuning.
The important part is that Active-Core Tuning can impose a lower ceiling than your per-core ratio. So if you set a core to, say, 55×, but the active-core table still limits operation to 54× when multiple cores are active, you won’t necessarily get 55× under that workload. So, if you don’t want a number of cores to work at a higher speed than others, I would suggest incrementing both the multipliers at the same time.
If your workload demands a specific number of cores to work at their best speed, the top section is for you. However, if you want to make your CPU overall faster, you should pick per-core tuning. I would start first with the P-Core Tuning and increase the multiplier by one step.
After this, I would run the stress test on the XTU itself to check the system for stability.
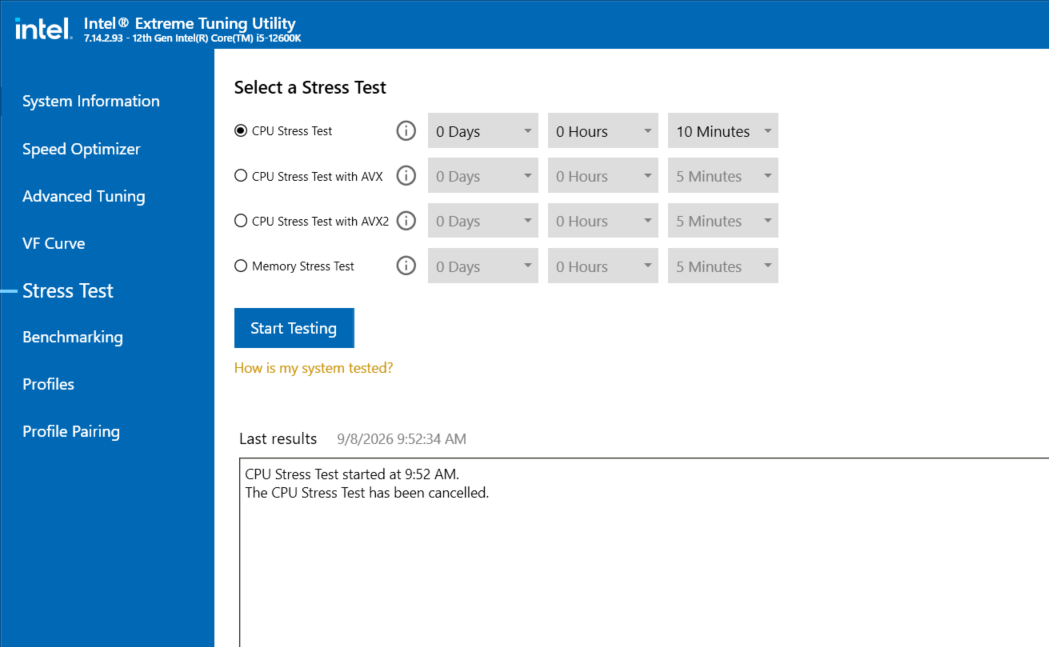
I will keep an eye on the maximum temperature as well. We can observe that the CPU has now achieved the maximum P-Core frequency of 4.80 GHz, and the temperature stays below 85 degrees Celsius.

Here, we are looking for any crashes, slowdowns, very high temperature, jitters, or BSODs. If you see any system stability, your next step is to increase the voltage a little bit. If not, you can proceed to increase the multiplier one step further.
This time, I am taking the P-Core directly to 50x and the E-Core to 40x. I will apply the settings again and run the stress test for 20 minutes or half an hour this time.
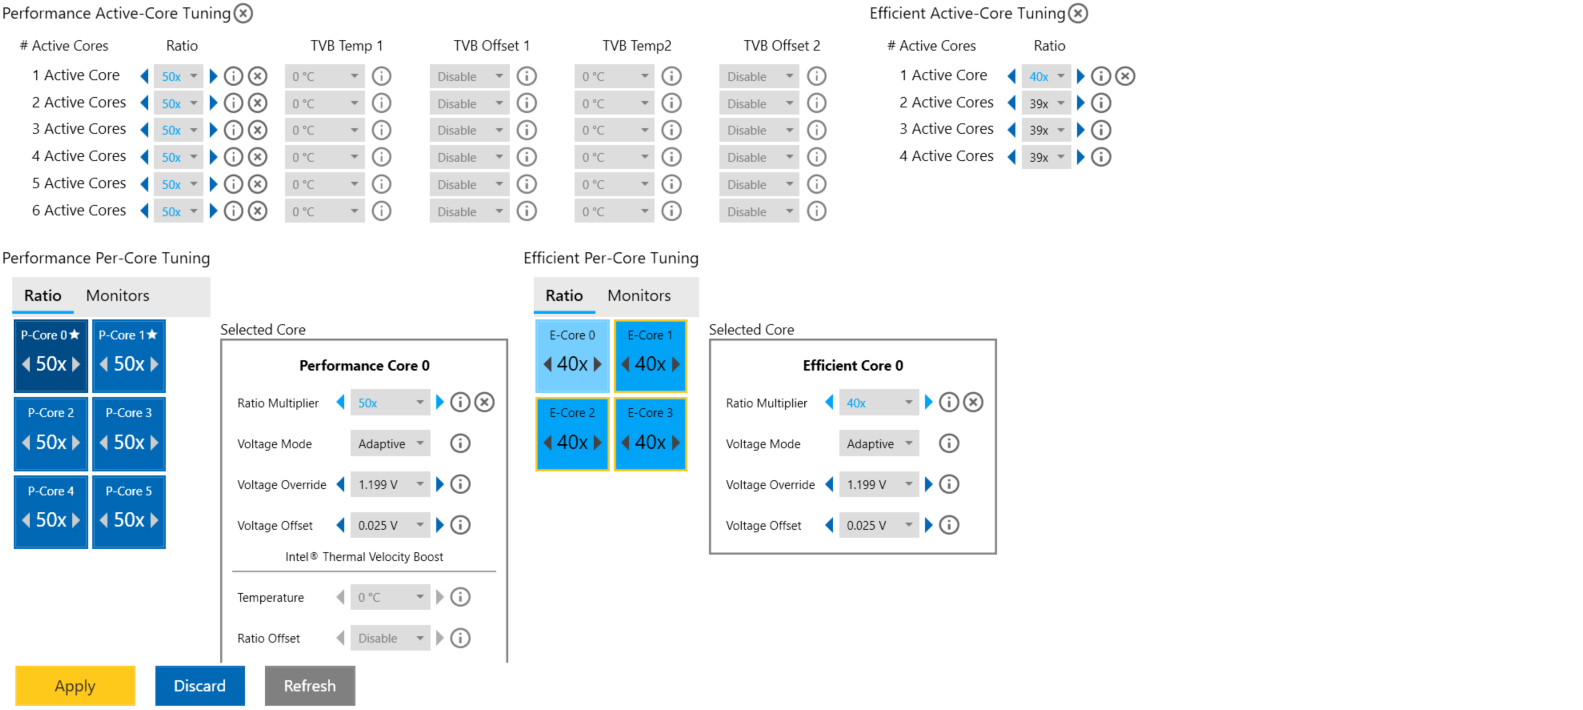
In this stress test, my CPU reached the maximum frequency of 5.0 GHz and hit the maximum temperature of 95 degrees Celsius.
I will now also run the Cinebench and keep an eye on HWiNFO sensor data.
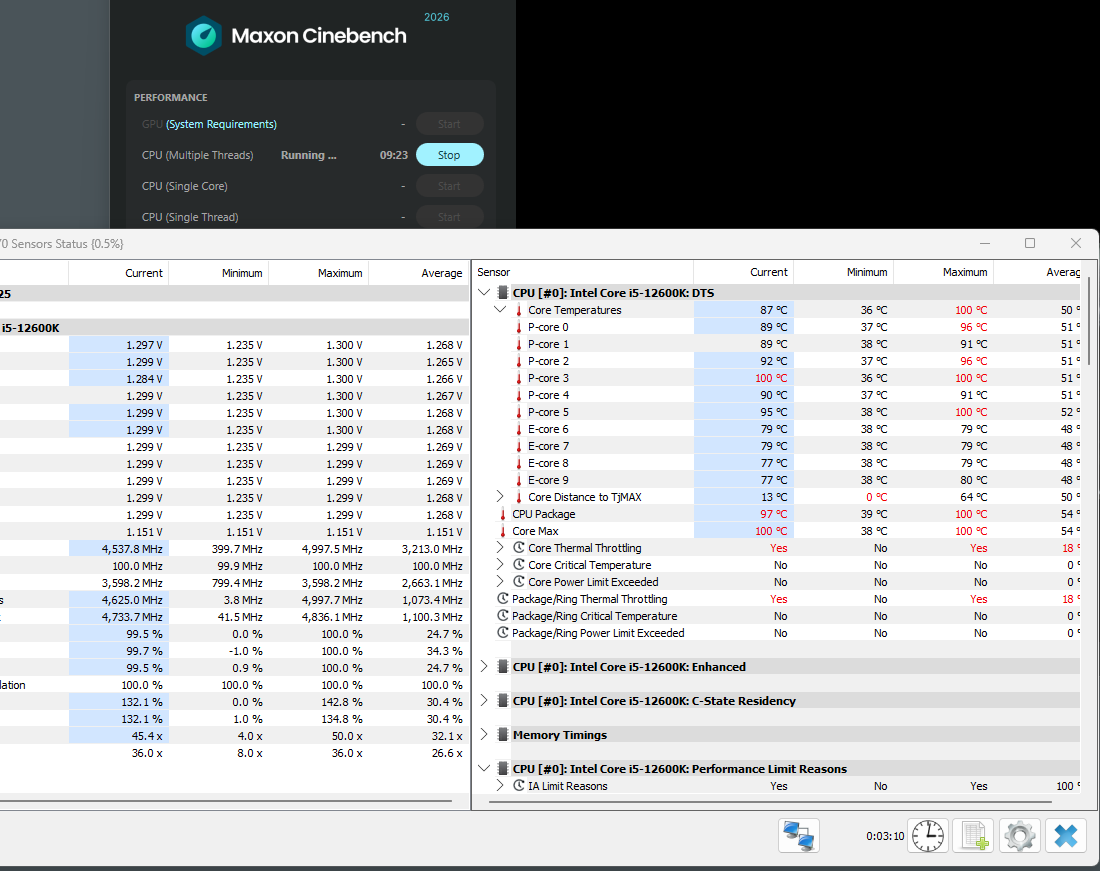
In the Cinebench test, I saw that the temperature is reaching 100 degrees Celsius, and this isn’t a good temperature to hit under sustained load. From the HWiNFO data, you can see the CPU has hit thermal throttling, which is another sign of a bad overclock.
100°C is TJmax on this chip, which means the CPU is now clocking itself down to protect itself. For an overclock you actually intend to use every day, I would aim to stay under about 90 °C in a sustained multi-threaded load.
How to actually undervolt, step by step
I will stop raising the multiplier and run towards efficiency. I have taken this CPU till 5.1 GHz before, but I am not going to try this. Now, if you are also experiencing this temperature problem, the next step is to reduce the voltage little by little until you hit the sweet spot of the best power consumption and performance. The process is called CPU undervolting. I have discussed it in detail in this article.
I would reduce the voltage offset, which adds or subtracts a specific amount of voltage from the processor’s default operating level. I will reduce it step by step and run a stress test every time to check on the maximum temperature and stability. Reduced voltage to the CPU can result in crashes. So, you have to look out for that mainly. Until the temperature gets under control and the system is working properly, you should generally keep reducing this voltage.
The setting you want in XTU is Core Voltage Offset.
Here is the loop you’ll have to follow:
- Write down your baseline. Peak VID, peak Vcore, package power, package temperature, effective clock, and a Cinebench score at your current settings. You cannot tell whether an undervolt worked if you don’t know where you started.
- Apply -25mV
- Run a stress test for 10 minutes and watch for crashes.
- Run Cinebench and compare the score. If the score has dropped while the clocks look the same, that is clock stretching, and you have gone too far already.
- If all three are clean, apply another −25 mV and go again.
- Once you are past about −100 mV, drop to −10 mV steps.
- When you finally hit instability, step back two increments, not one.
If the temperature doesn’t come under a good limit, it is better to reduce the multiplier a little bit.
The goal here is to find the maximum multiplier or clock that can be sustained under the least voltage possible at a manageable temperature.
Ring/cache ratio
The ring, also known as the cache or uncore, has its own ratio, and on 12th gen, a lot of people leave it completely untouched. The ring is what connects your cores to the L3 cache and the memory controller. So, it is important in anything latency sensitive including gaming. There is one thing to be aware of on Alder Lake. The ring is loosely tied to the E-core ratio.
Tune it the same way as everything else. One step at a time, apply, stress test, benchmark, repeat. It will usually run out of headroom well before your P-core ratio does.
Changing values in BIOS and saving permanently
The changes in XTU are done on the software level, and in case you have to uninstall it, the overclock will go away as well. So, it is better to save these values in the BIOS and make them the new defaults so that the system boots up with them. Based on your motherboard, the overclock settings can vary. However, it is easy to find the multiplier and GHz sections for P-Cores and E-Cores specifically.
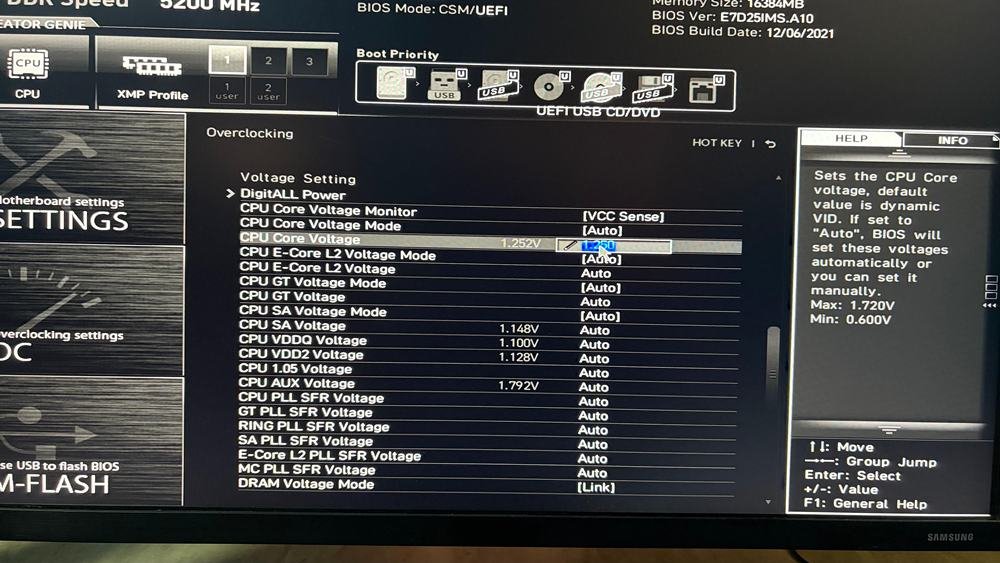
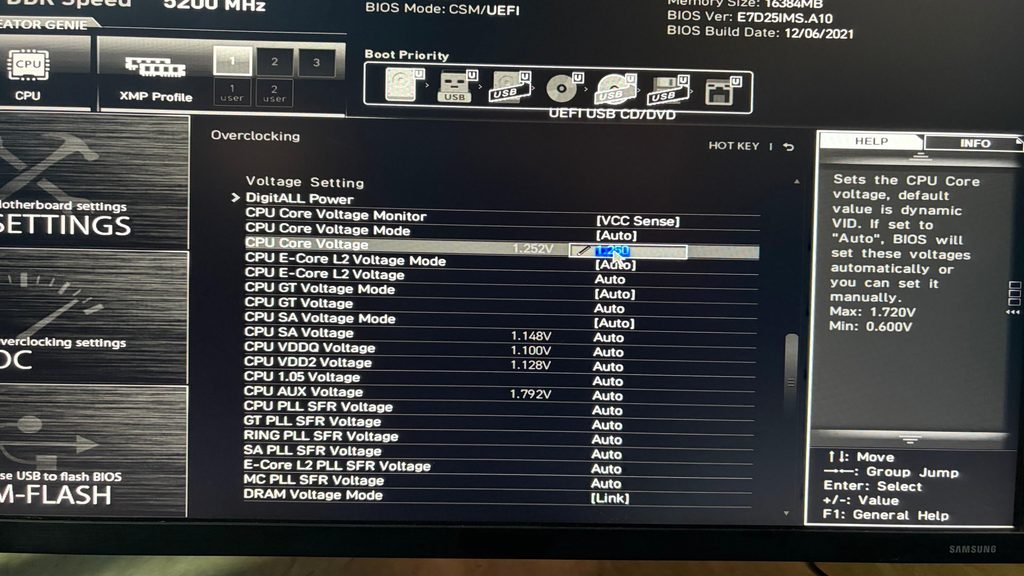
If you are not comfortable using your BIOS/UEFI, you are good to go with the XTU only. Just make sure you save the settings in the XTU and do not install it from your computer.
Three more settings worth knowing about
Three more settings worth knowing about
These three are not part of the basic loop, but you will run into them, and you should know what they do.
AVX offset. Heavy AVX2 workloads demand far more current and generate far more heat than normal code. Without an offset, that one workload sets your ceiling for everything else. An AVX offset drops the multiplier by a set number of steps only when AVX instructions are running, so you can hold a higher everyday clock without your one rendering job dictating the whole profile.
Thermal Velocity Boost. TVB gives you extra frequency when the chip is running cool and takes it away as it heats up. It is adjustable, and Speed Optimizer touches it in some configurations. If you have improved your cooling, this is one place that improvement turns into actual clock speed.
BCLK. Everything in this guide so far has moved in whole multiplier steps, which is a fairly coarse tool. BCLK adjusts the base clock that the multiplier multiplies, so it lets you land between those steps. It is also the only lever available on locked chips, on the boards that support it. Just remember that other clock domains are derived from BCLK too, so changing it moves more than your cores.
Recovery
Before you commit anything to BIOS, save a known good profile and export it to a USB stick. When you clear CMOS, your stored profiles are cleared out along with everything else. If a BIOS overclock will not POST, most boards will retry a few times on their own and then fall back to defaults. If yours doesn’t, clear the CMOS using the rear panel button or the jumper on the board. Make sure to power off the system first.